

Richard Mason
By day I help people solve problems, by night I'm enjoying IPAs! For fun I work in my garage building gadgets that cost way more than they are worth.

Harnessing Innovative Tech to Navigate Manufacturing Tariffs Efficiently
Explore how innovative tech like IoT monitoring, manufacturing KPIs, and Scout Systems' software helps navigate potential tariffs in manufacturing.
 2 min read

Revamping Manufacturing with Free Work Instruction Software
Revamp your manufacturing workflow with Scout System's free work instruction software for optimized, efficient assembly line instructions.
3 min read 
Understanding Work Instruction Software Terminology
When considering work instruction software for factories, ensure the software aligns with long-term manufacturing goals to avoid limitations.
2 min read 
Benefits of Using Modern SOP Software
The continuous challenge in finding skilled labor, and increasingly difficultly in maintaining compliance and quality expectations has led to an increase in the use of Standard Operating Procedures (SOP). Traditionally processes have relied on software such as Excel/Word for documentation, however modern SOP software has made those platforms obsolete.
4 min read 
Work Instructions for Production: How to Succeed
To maintain quality and efficiency in production, detailed work instructions for production are essential. Clear guidance prevents errors and delays.
5 min read 
Unlocking Efficiency in Low Volume High Mix Production
Manufacturers face challenges in delivering flexibility in low volume high mix production environments, demanding precision and versatility.
5 min read 
Boost Manufacturing Efficiency with Scout Systems
Boost manufacturing efficiency with Scout Systems' shopfloor management software that optimizes processes and drives continuous improvement.
7 min read 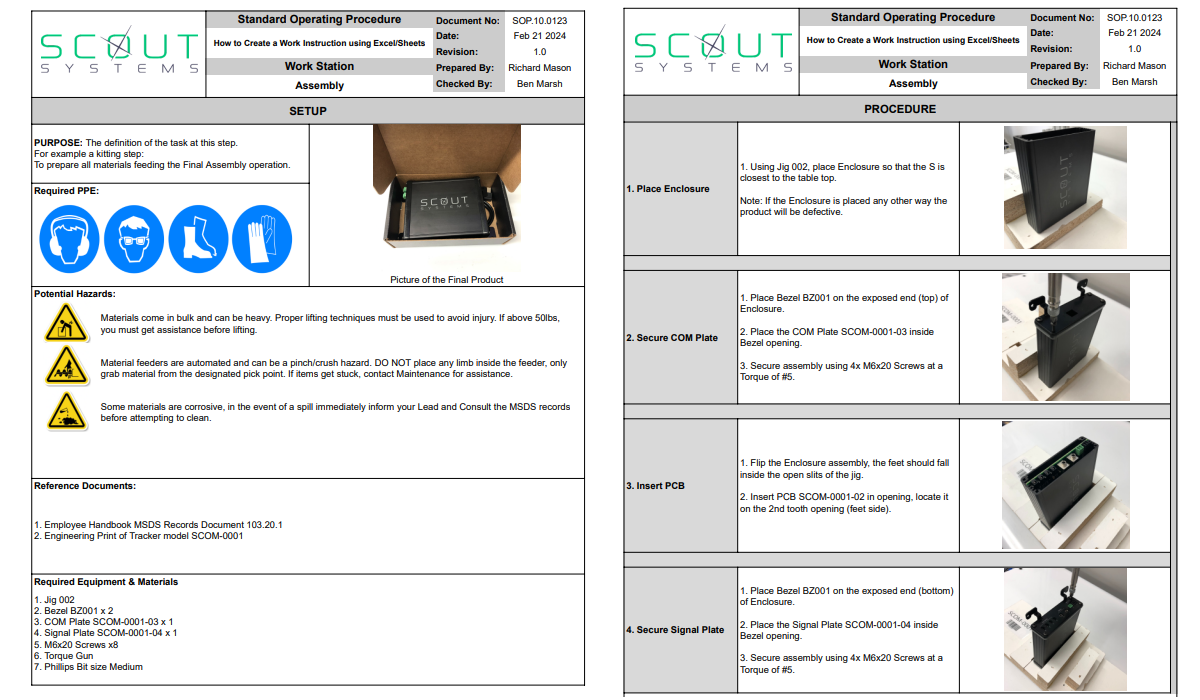
Work Instructions VS Digital Work Instructions
Revolutionize your fabrication workflow with digital work instructions. Ensure precision and real-time updates to impress clients and enhance operational efficiency. Say goodbye to outdated paper methods.
5 min read 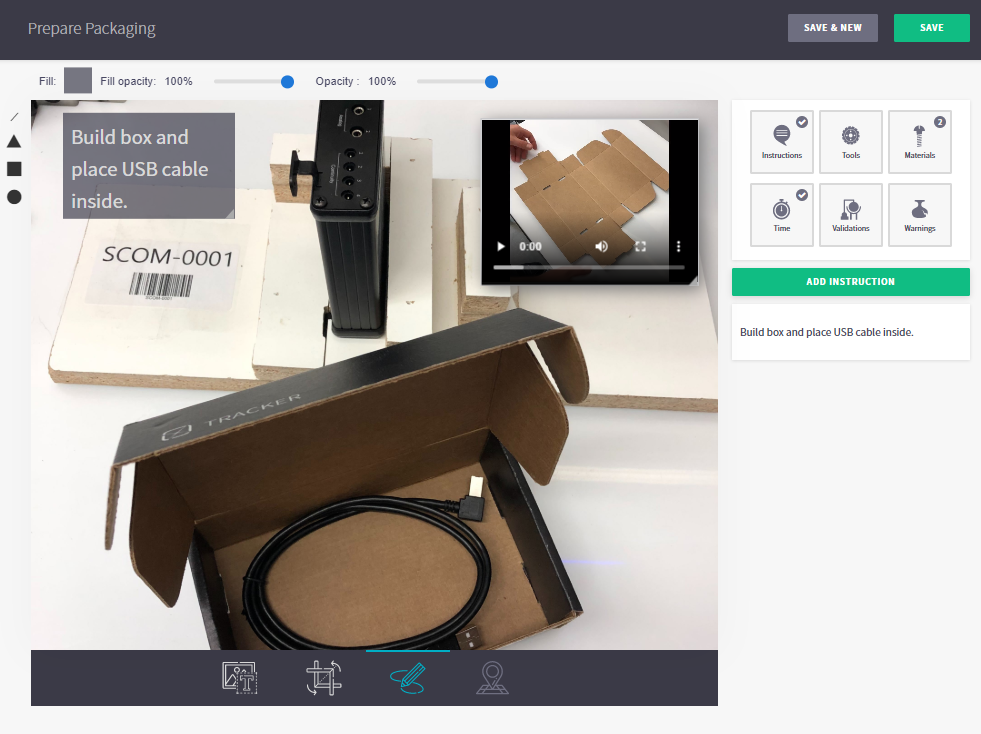
5 Standard Work Instruction Examples
Explore 5 effective work instruction examples enhancing manufacturing processes with real-life images and digital tools for optimal efficiency.
5 min read 
What is Internet of Things Technology and How Does It Work?
Explore IoT's transformative power: merging digital and physical realms for smarter decisions, enhanced security, and operational efficiency.
5 min read