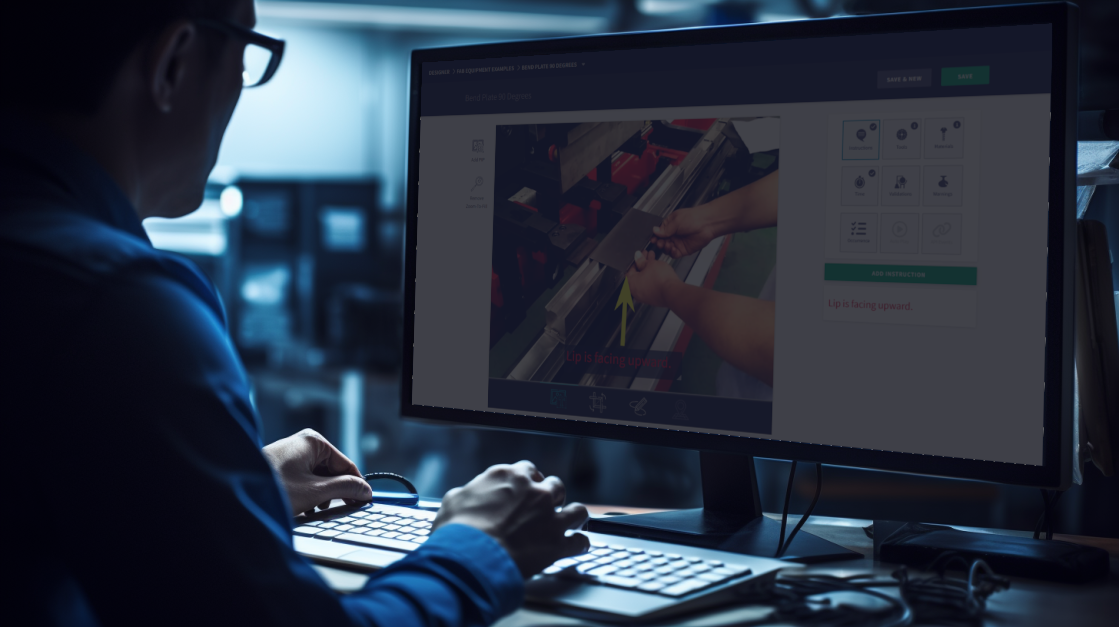
Production stops can be a common challenge in manufacturing, and it is essential to gather data on their frequency, causes, and total duration to identify opportunities for improvement and prevent future hindrances. In this training session, we will explore the Pause screen, a valuable tool for tracking and analyzing production stoppages.
Accessing Pause Screen
Whether you are utilizing Digital Work Instructions or Instruction-Less mode in Compass, Operators have access to the Pause button to manage production pauses effectively.

In Instruction-Less jobs, you can find the Pause button conveniently located at the bottom-left hand side of the screen, accessible in both Setup and Build modes.

For jobs that utilize Digital Work Instructions, the workflow always begins with the Setup Details page. In this mode, the Pause button is conveniently located at the top-right of the screen, adjacent to the "START JOB" button.

Once the job has commenced, the Pause button can be found at the bottom-left of the page, positioned next to the "NEXT" button.
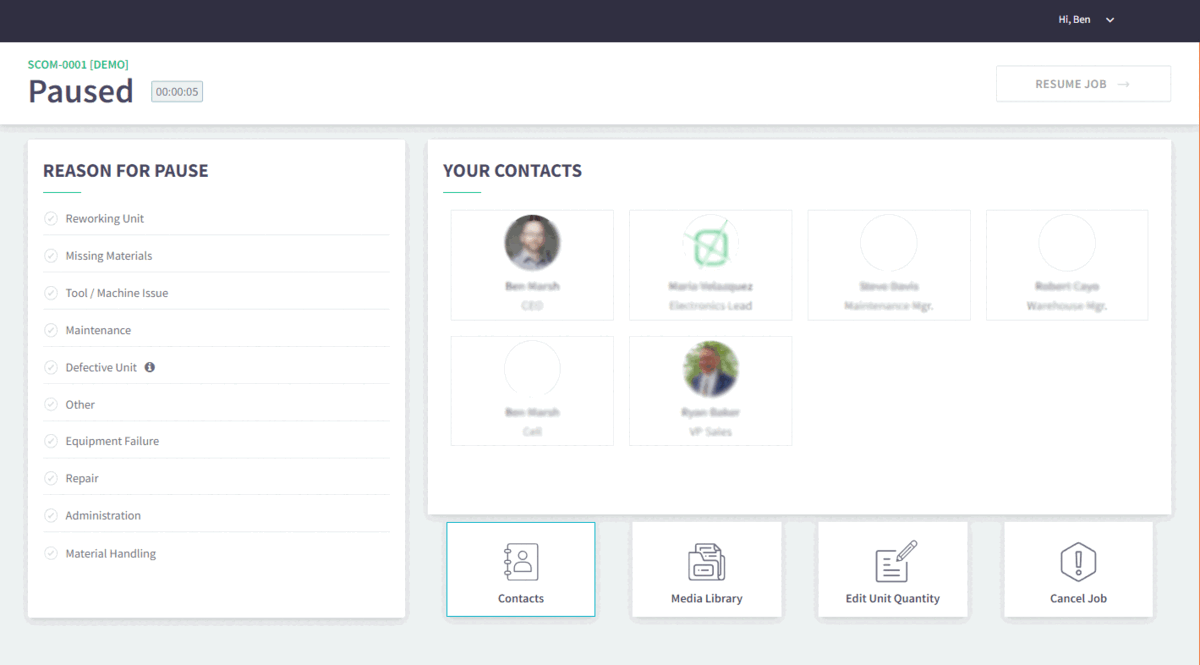
Reason For Pause
When the Pause button is activated, Compass will immediately pause all production timers and display the Pause Screen to the Operator. On this screen, a new timer will appear, specifically measuring the elapsed time of the production stop.
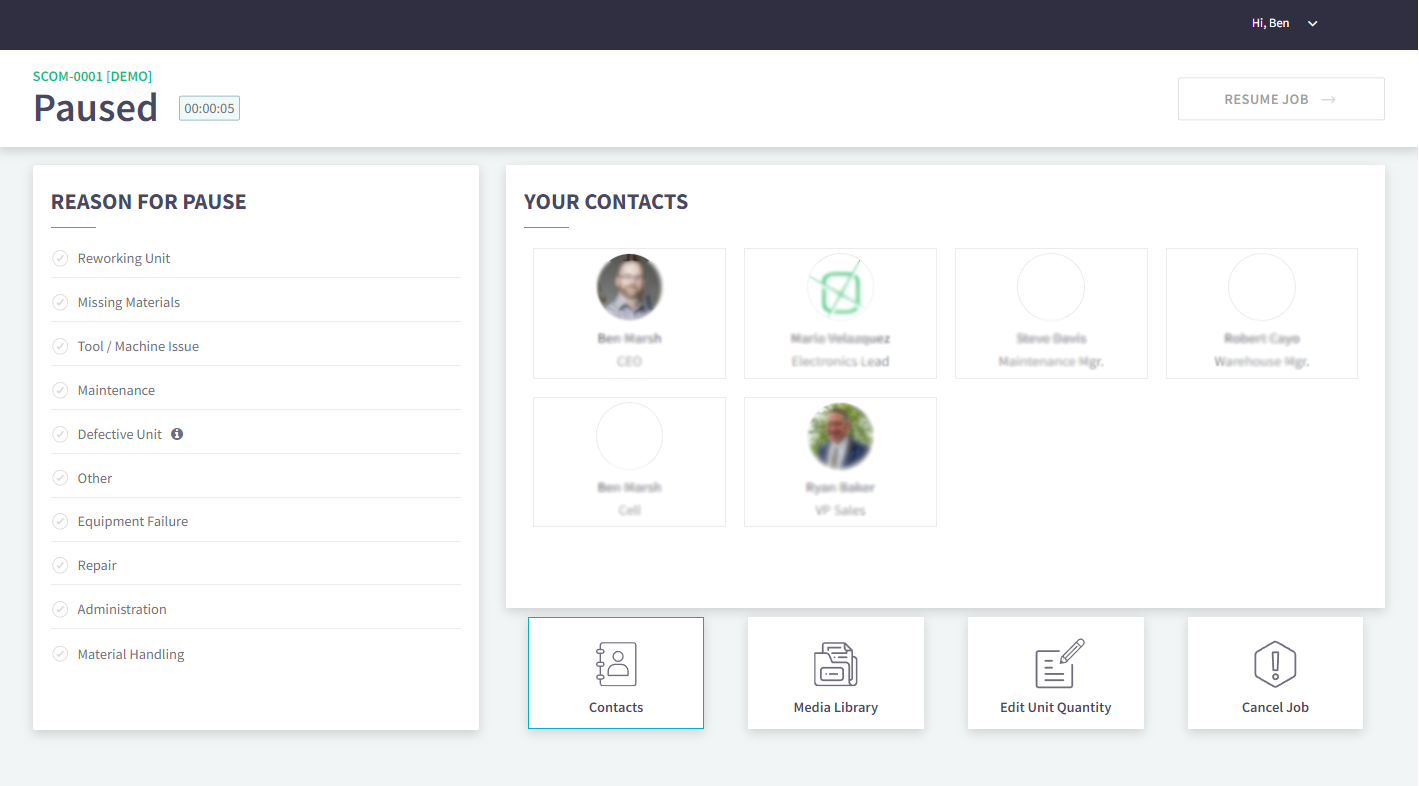
To resume Production Mode, operators must first select a reason for the pause from the list provided on the left-hand side of the screen. Once a reason is chosen, the "RESUME JOB" button at the top-right of the screen will become enabled, allowing operators to proceed.
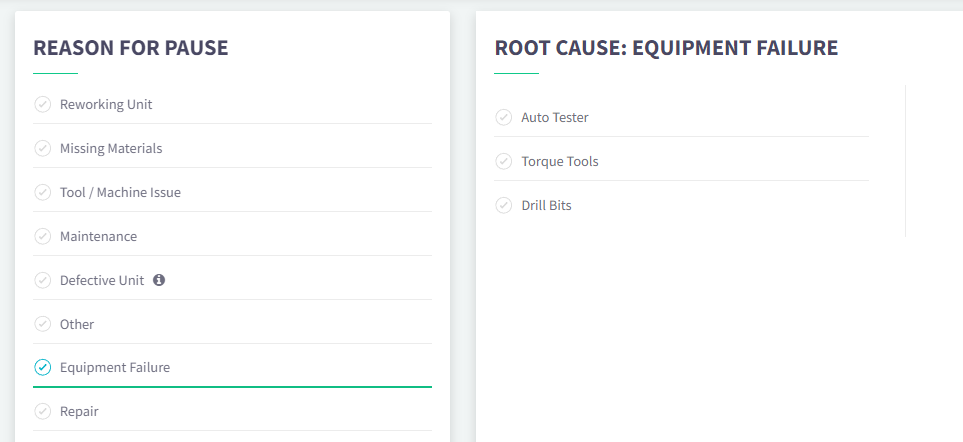
In cases where an account is configured with Root Cause issues, selecting a reason for the pause will trigger the appearance of a secondary selector. This secondary selector prompts operators to identify the problem more specifically, providing a comprehensive view of the issue.
Choosing the most accurate reason and, if applicable, specifying the root cause is crucial for effectively measuring the operational challenges that Production Operators encounter. By accurately capturing this information, you can analyze trends, identify recurring issues, and implement targeted improvements to enhance productivity and streamline the production process.
Defective Unit
In the event of a defect that necessitates removing a unit from production and initiating a new unit, operators can choose the "Defective Unit" option from the Reason For Pause menu. This action triggers the opening of the Root Cause: Defective Unit screen, which prompts the gathering of supplementary information regarding the root cause of the defect.
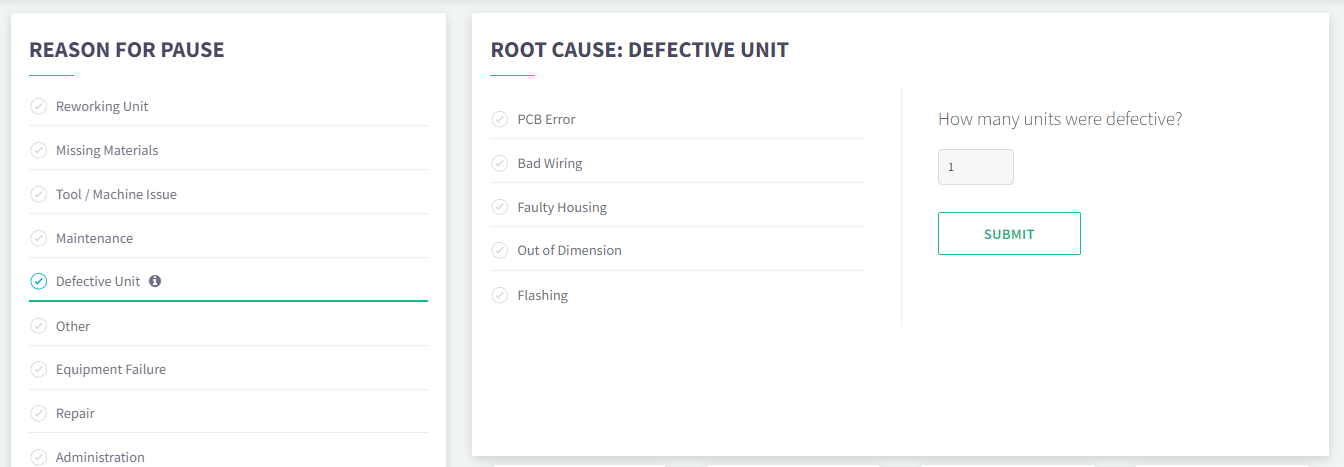
Upon choosing the root cause of the defect, operators can additionally specify the number of units that were found to be defective, a particularly valuable aspect for Batch flow scenarios. Once the "SUBMIT" button is activated, all production data linked to that particular unit will be categorized as Production Waste, and the Instruction will recommence from Step 1.
Your Contacts
In case an operator requires support, they can simply press the "Contacts" button located at the bottom of the screen. This action will open a list of all available users to communicate with within that specific Work Area.

Once the desired person is selected from the list, certain contacts may offer pre-defined Message Options that become available upon engaging their name. Operators can choose the message that best suits their immediate requirement and then press the "SEND MESSAGE" button. When a message is sent, the system will convey essential details, including the operator's identity, the station in use, the reason for the pause, and any chosen Message Option.
Media Library
If HQ Designers have included any additional files with the Digital Work Instructions, these files will be accessible in the Media Library. However, if no files have been added or if you are in Instruction-Less mode, the Media Library button will be inactive.
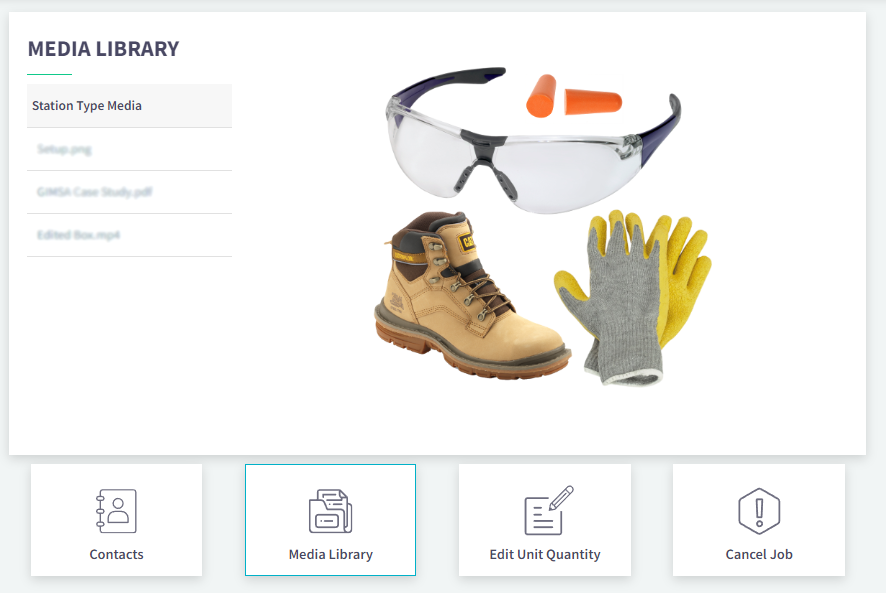
To access files stored in the Media Library, simply choose them from the list located under "Station Type Media". This comprehensive library supports a variety of file formats including images, PDFs, and videos. These files can be conveniently displayed on the screen, providing operators with the visual and informational resources they need to perform their tasks effectively.
Edit Unit Quantity
If operators need to modify the quantity of the production order, they can achieve this by selecting the "Edit Unit Quantity" button located at the bottom of the Pause Screen.
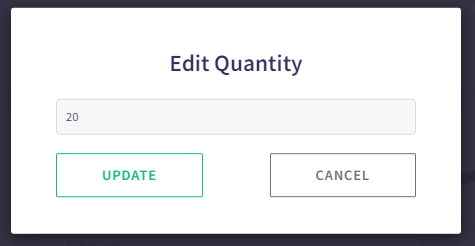
For jobs that involve Digital Work Instructions, the adjusted Quantity must exceed the count of units that have already been completed. Maintaining the integrity of the total quantity is crucial; it should accurately reflect the number of units that the station will independently manufacture. This alignment is especially significant, as when the quantity of completed units matches the total quantity specified, the job will be automatically concluded. This streamlined process ensures that the production order is precisely fulfilled, reducing potential discrepancies in the manufacturing output.
Cancel Job
If an operator needs to halt the currently running job on Compass, they can accomplish this by pressing the "CANCEL JOB" button situated at the lower-right side of the Pause Screen. This action presents the user with two options: they can choose to either Delete the job or Suspend it, depending on the situation and operational requirements.
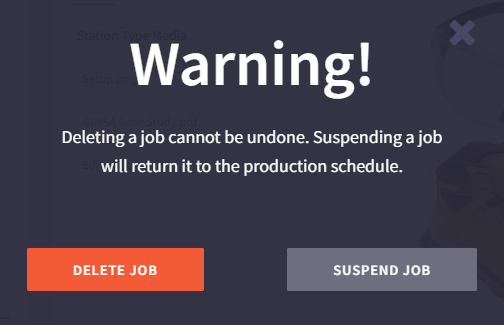
If a job is deleted, all associated data will be permanently removed and treated as production waste. This action is irreversible and should be undertaken only if the captured production data is severely compromised. An appropriate scenario for opting to delete data is when Compass was left running without any actual work being performed, and there is a need to rectify inaccurate information.
Suspending a job will freeze all production data and place the job back into the Production Queue and will be available to reactivate in the future.
Alert Mode
Every Work Area has the capability to be configured with an automatic Alert Mode. When the pause timers reach the predetermined threshold, the Pause Screen will transition into Alert Mode. This adjustment enhances the screen's visibility, making it more noticeable for support staff, and allowing them to swiftly respond to critical situations.
It's important to note that Alert Mode does not affect production data in any way. Its purpose is solely to provide an additional means of notifying essential support staff that assistance is required, ensuring effective communication and prompt resolution of any issues.


 2 min read