
In this training session we will review Setup and uploading images to Work Instructions in HQ Designer. Before proceeding with this training, please ensure that you have completed Designer Part 2 ('Creating A Unit'). This training assumes that you already have a Unit set up in the system.
Setup Instructions
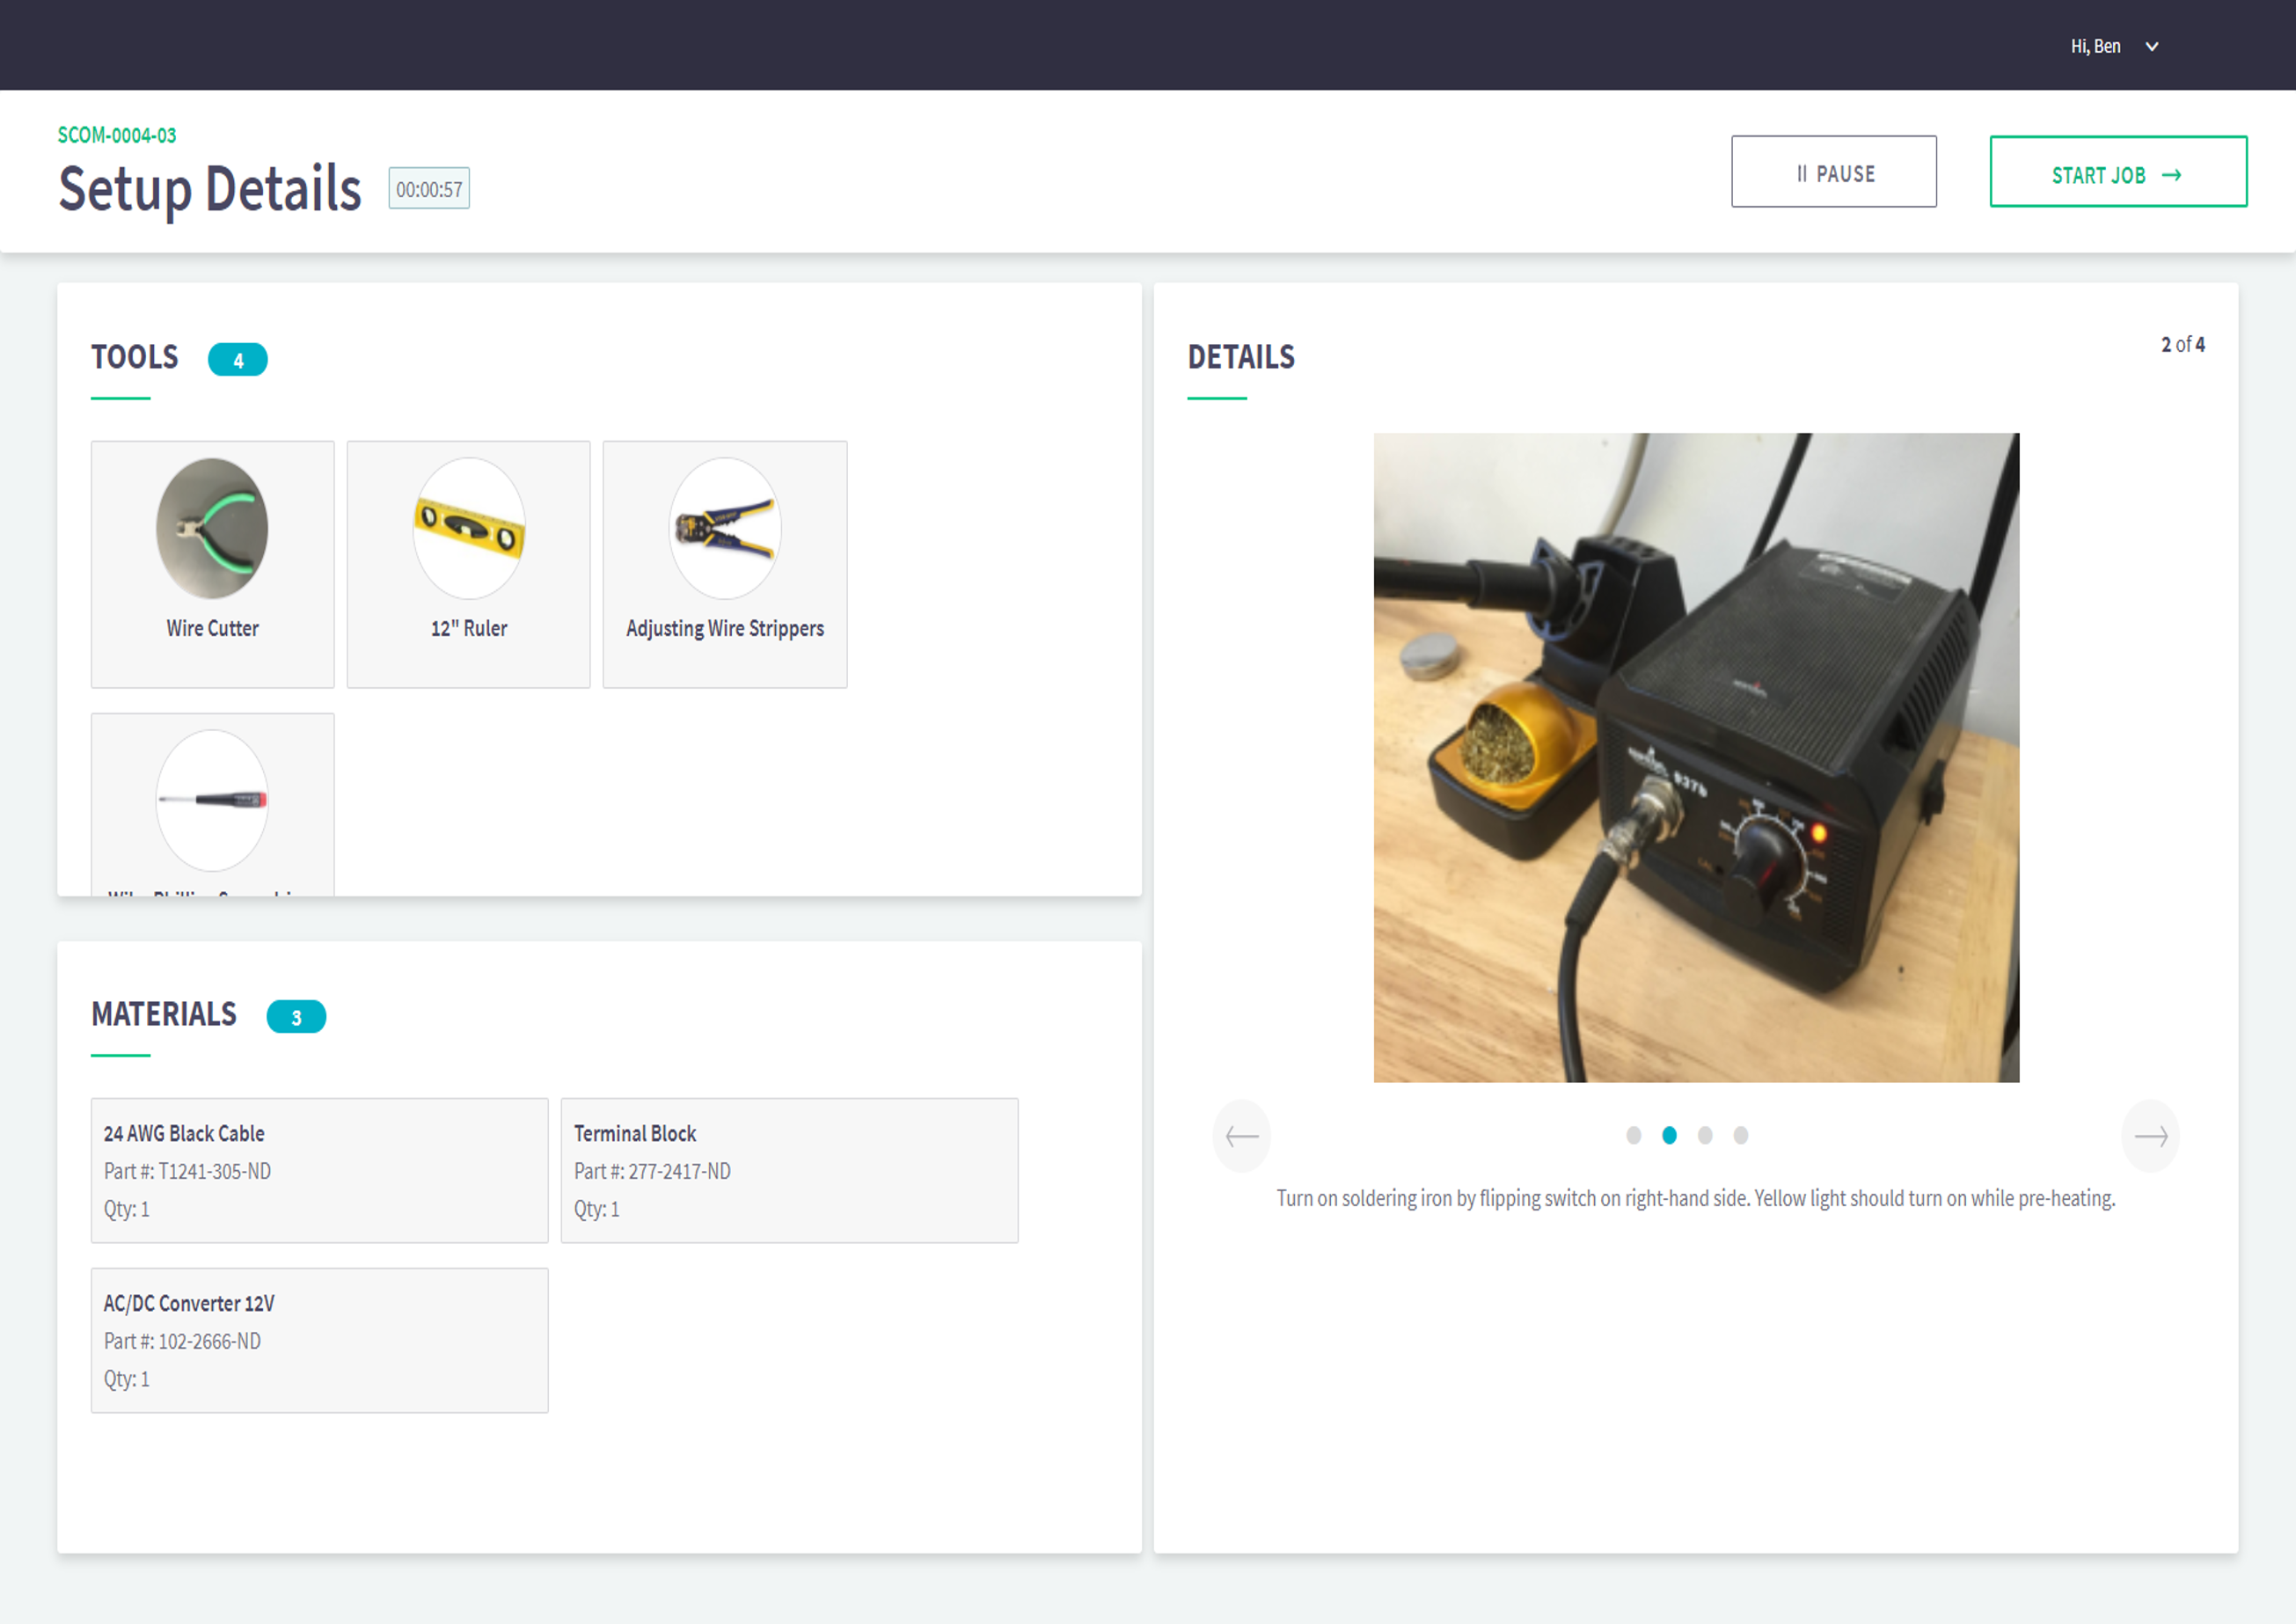
In Compass, the production floor application, an essential feature is the ability to auto-compile all the Tools and Materials used in a Work Instruction. These compiled tools and materials are then displayed in the Setup Details page for easy reference and accessibility.
On the right side of the Setup Details page, you will find a section titled "DETAILS." This section contains multiple images and accompanying text.
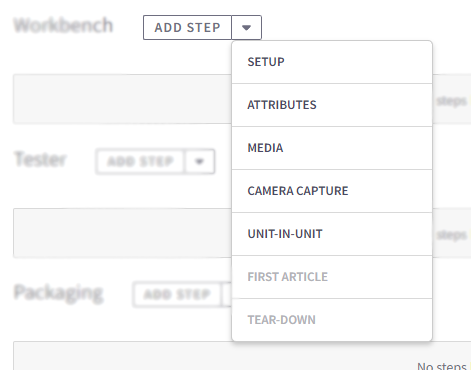
To create or make changes to the Setup Instructions, click on the down-arrow and select "SETUP". This will open the Setup Details Module.
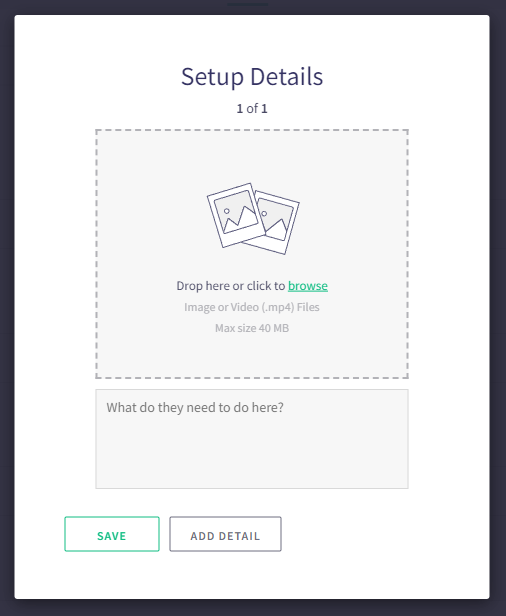
In the Setup Details Module, you have the option to enhance the Work Instruction by uploading images and corresponding text. These visuals and descriptions are designed to assist operators in preparing for the production run.
To save the changes you've made in the Setup Details, simply click on the "SAVE" button. If you have multiple instructions that you want to include in the Setup Details, you can press the "ADD DETAIL" button. This allows you to add additional images and accompanying text to cover various aspects of the setup procedure comprehensively.
ADD Step
Work Instructions are constructed using individual Steps, which represent the specific actions required of your production staff. To create a Step and access the editor, click on "ADD STEP" from the ADD Menu.
Naming Step
When you create Steps, they are initially generated with default names such as "Untitled Step #1", "Untitled Step #2", and so on. To change the name of the step click on the name and it will become editable.
It is highly recommended that you rename these Steps to match the specific tasks they represent. Providing meaningful names to the Steps can be incredibly useful when reviewing Production Reports.
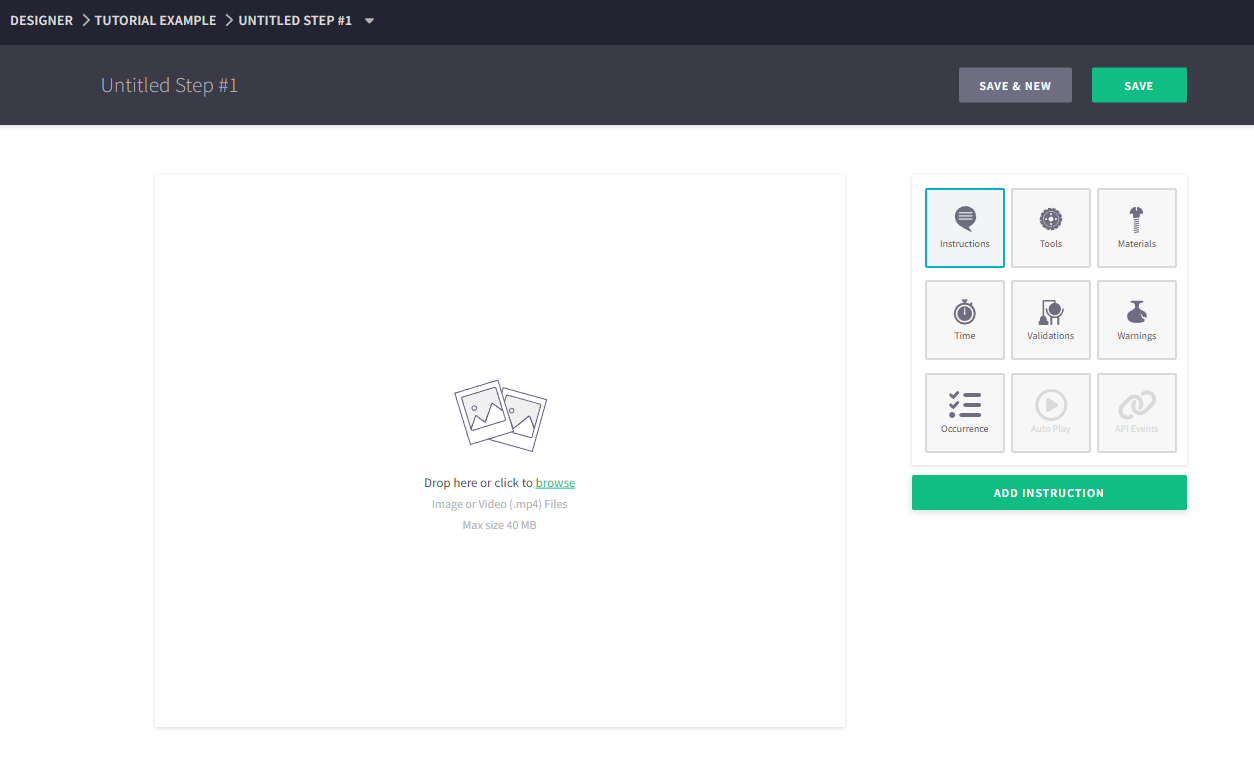
Selecting Step Image
To add an image to the Step, drag the file from the known folder on your computer, or click on the large image tile and browse for it instead.
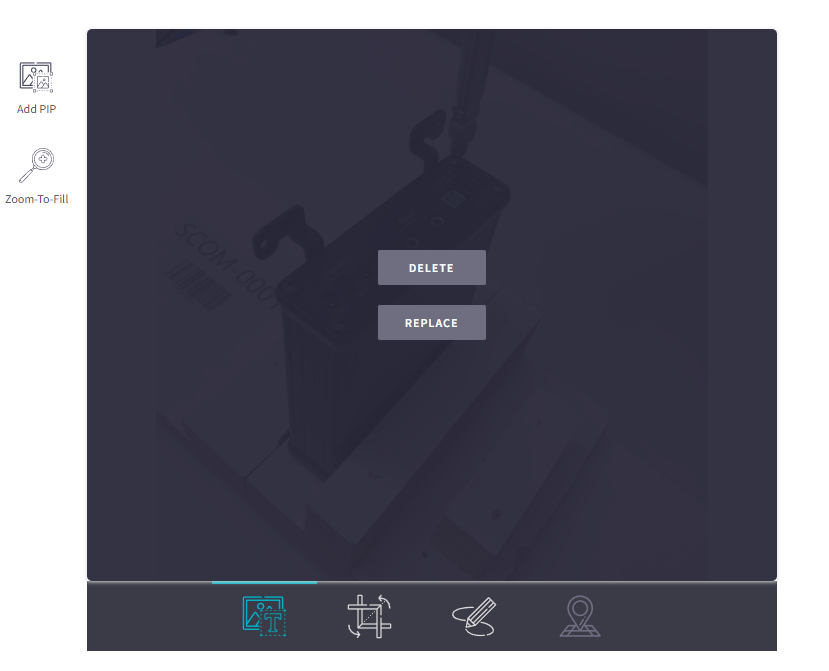
When you assign an image to a Step in the Work Instructions, additional features become available. Clicking the image will engage it, offering options to DELETE or REPLACE the image when hovering over it. To disengage the image, click anywhere on the image, excluding the two buttons.
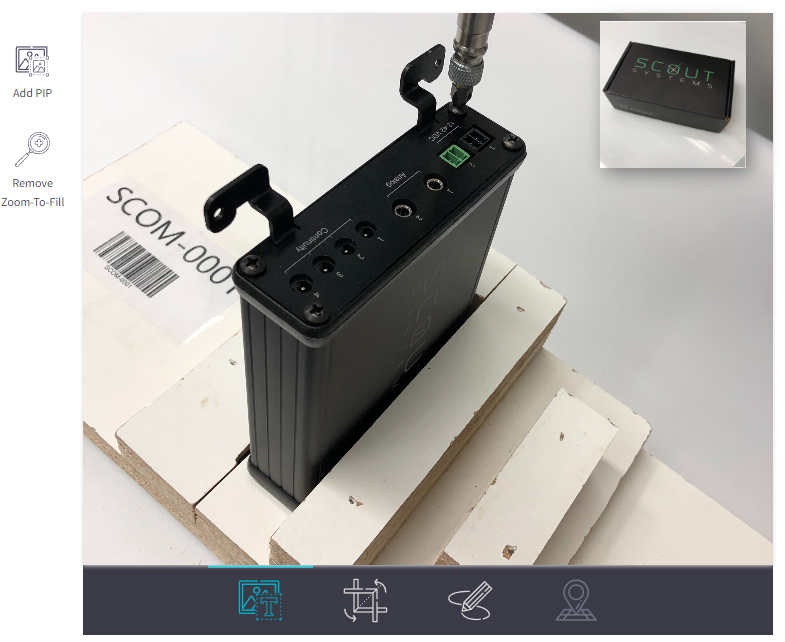
Zoom-To-Fill
Standard Step images have a 5:4 ratio. If the image you selected does not match this ratio, you may encounter white space either on the left/right side or top/bottom of the image. To resolve this, you can use the "Zoom-To-Fill" button. When you press this button, the image will be enlarged to fit the Step perfectly, ensuring no white space is shown and providing a visually appealing presentation of the image within the Step.
Picture-in-Picture (PIP)
For more complex Steps, you can use multiple images by utilizing Picture-in-Picture (PIP) functionality. At the top-left of the Image Tile, you will find a button named "Add PIP." Clicking this button will create a new image layer and allow you to load another image.
You can add multiple PIPs to a single Step, and these PIPs can even be in the form of video files (up to 40 MB in size). Clicking on a PIP will engage it, providing options to 'DELETE' or 'REPLACE' the image, similar to the main Step Image.
Crop and Rotate Image
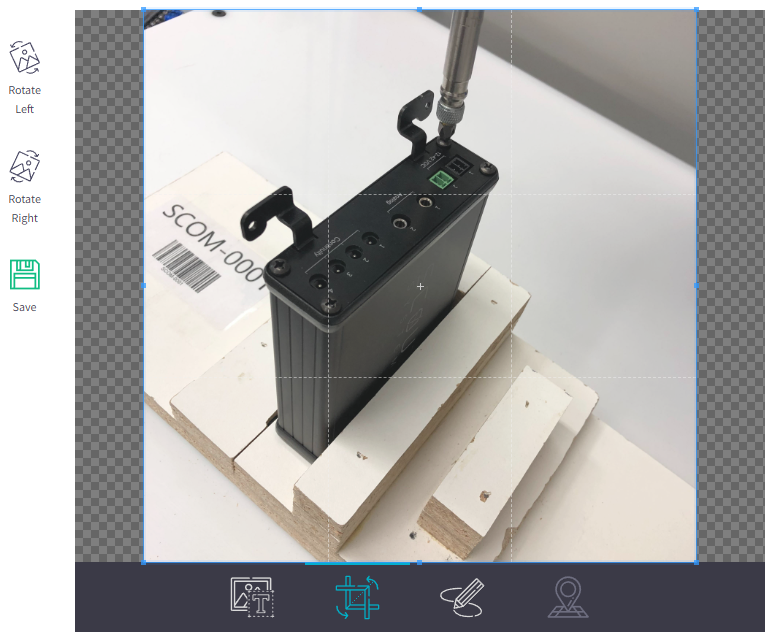
Below the Step Image, you will notice 4 icons. Clicking on the 2nd icon from the left will switch the tool to Crop and Rotate mode. Once engaged, 3 new icons will appear on the left side of the Step Image. You can use Rotate Left or Right to rotate the image by 90 degrees. To crop the image, simply click on any perimeter of the image and move it to the desired location. Remember to press the Save icon on the left side to save your changes.
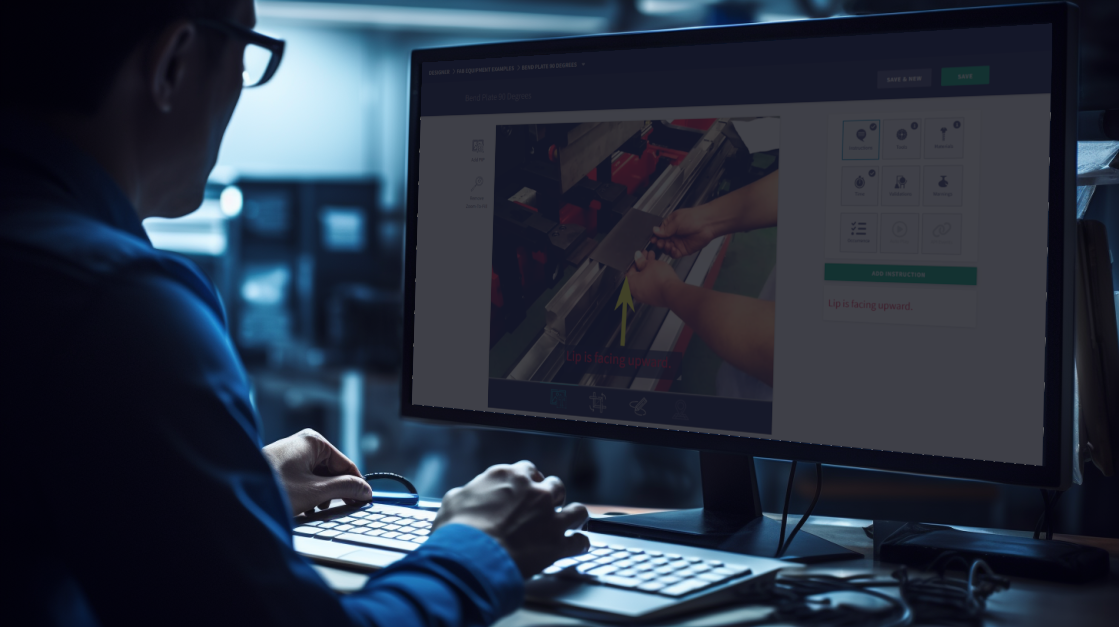
Drawing Editor
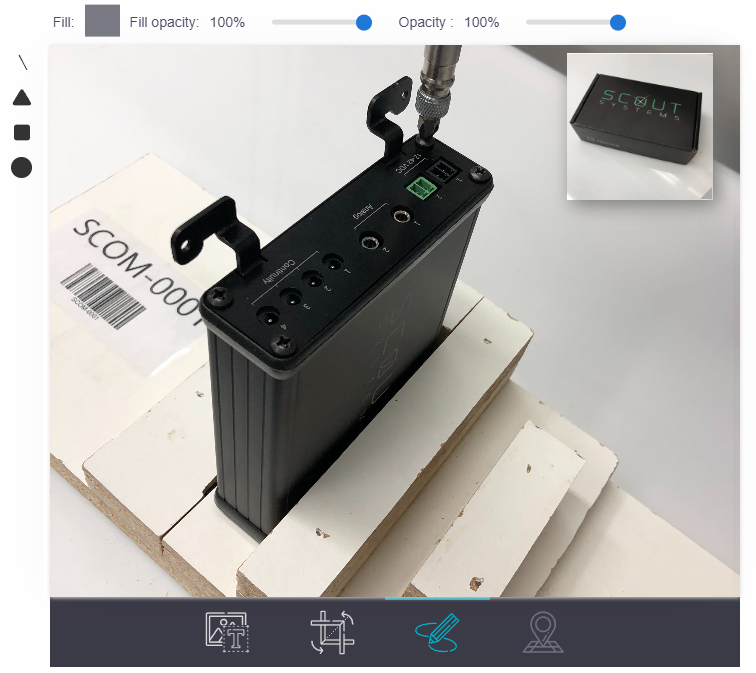
When you click on the 3rd icon from the left, located below the Step Image, the tool will switch to the Drawing Editor. With this feature engaged, you gain the ability to draw directly on your main image. To the left of the Step Image, you can select the shape you intend to use for your drawing. Above the Step Image, you will find options to specify the colors and weights of the shapes you draw. This powerful drawing tool enables you to annotate your images and add important visual cues or notes directly to the Step, enhancing the clarity and comprehensiveness of your Work Instructions.
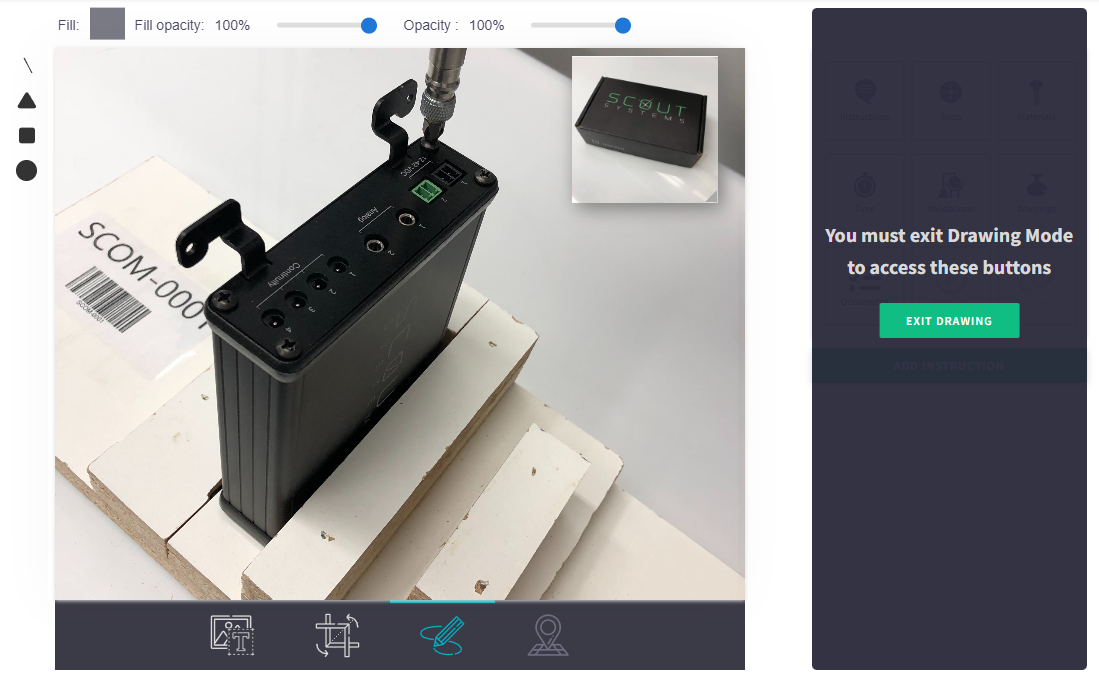
When you are done Drawing over your image, you must exit the Drawing Editor to make further changes. To do this either click far left icon below the Step Image (Image/Text Editing) or move your mouse to the right of the Step Image and click "Exit Drawing".


 2 min read