In today's training session, we will focus on the Tool Library from an HQ Admin perspective. As an HQ Admin, you have unique abilities and privileges when it comes to maintaining tools within Scout Systems.
Tool Library

Accessing the Tool Library is done by visiting HQ Admin, and selecting "TOOLS" from the top-center navigation.
When it comes to production tools in Scout Systems, there is some overlap between the roles of HQ Designer and HQ Admin. Users with Designer access have the ability to create and select tools to embed within the digital work instructions. However, this functionality is limited to the HQ Designer application.
On the other hand, HQ Admins have broader capabilities when it comes to managing production tools. They have the authority to create, edit, delete, and merge tools within Scout Systems. This elevated role allows HQ Admins to have greater control and flexibility in maintaining and organizing the tool library.
Create New Tool (from Admin)
At the top-left corner of the page, you will find the text "All Tools" within Scout Systems. To create a new tool, simply click on the "+" sign located next to "All Tools". This will open the Create New Tool module.
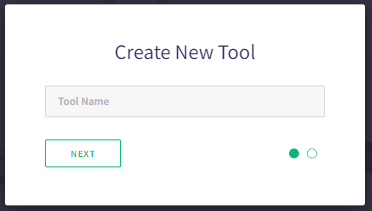
Adding a new tool has just 2 actions:
- Provide a Tool Name (press NEXT)
- Upload an optional image (press COMPLETE)
Edit a Tool
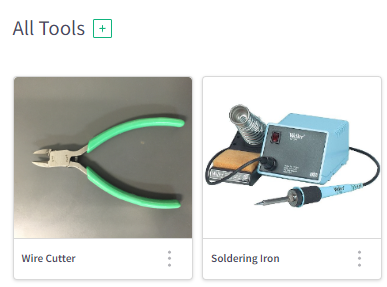
To edit a tool in Scout Systems, simply locate the tool tile and click on the three-dot menu at the bottom-right corner. This will open an editor that closely resembles the tool creation module.
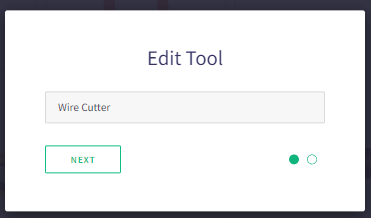
In the editor, you can change the name and image for the tool.
Delete Tool
To remove a tool from the library, engage the 3 dot menu of the tool tile and select "DELETE".
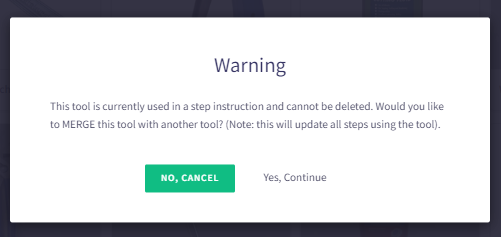
When attempting to delete a tool in Scout Systems that has been assigned to a Digital Work Instruction, a warning message will appear to notify you of the implications. The warning message informs you that the tool is being used in instructions and provides you with two options: "No, Cancel" and "Yes, Continue".
If you choose "No, Cancel," the deletion process will be canceled, allowing you to retain the tool and its associated assignments within the Digital Work Instructions.
On the other hand, if you select "Yes, Continue," the platform will proceed with the deletion process. It will locate all the instructions that are currently using the tool and remove the tool from those instructions accordingly.
Merge Tool
As an HQ Admin, one of the powerful privileges you possess is the ability to merge tools within Scout Systems. This feature proves particularly valuable when replacing legacy equipment in a factory with minimal effort and streamlined processes. To engage with this feature, locate the tool tile and press the 3 dot menu, and select "Merge".
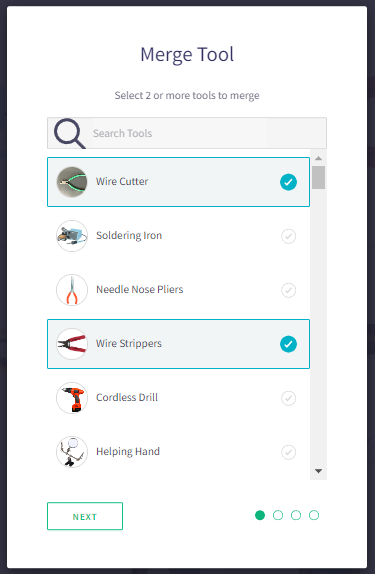
To initiate the merge process, start by selecting all the tools that will be affected. This includes choosing the legacy tools that will be removed and, if applicable, selecting the new tool that will replace them. Press Next to proceed.
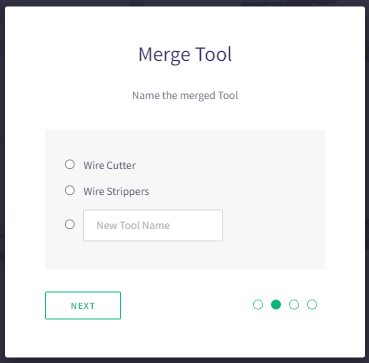
If you have included the replacement tool alongside the legacy tools, you will now need to select the tool that will remain after the merge. In the case where the new tool does not currently exist in the Tool Library, select the empty selection option and manually enter the New Tool Name. Press Next to proceed.
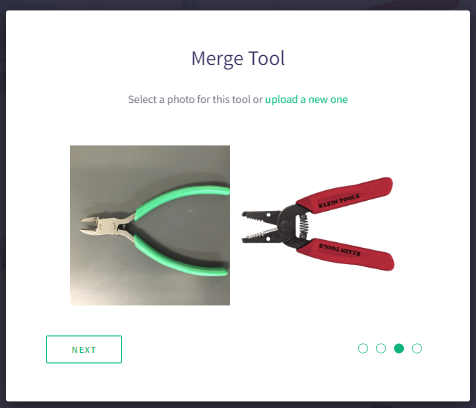
Next, the system will prompt you to select or set the picture that will be used for the newly merged tool. If the new tool already exists in the Tool Library, simply click on the image that corresponds to the tool that will remain after the merge. On the other hand, if there is no existing image for the new tool, click on the option to "upload a new one." Press Next to proceed.
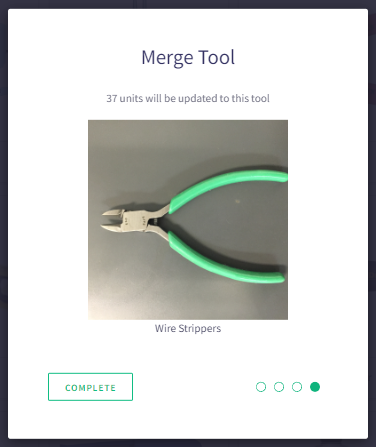
Lastly, the system will provide you with information on the number of Digital Work Instructions that will be affected by the merge. Take a moment to review the details and ensure everything is correct. If you are satisfied with the merge configuration, click on the "COMPLETE" button. This will initiate the merge process and update all the impacted instructions accordingly.


 9 min read